Thursday, July 26, 2012

Apartment Ideas


I will be moving into my first apartment at the end of August and I'm super excited to finally put all my ideas into place (hopefully they will all come together). My walls are white and I don't plan on painting them to save myself of having to paint them back white when I move out. I need to find lots of ways to brighten up the small space with pops of color. 


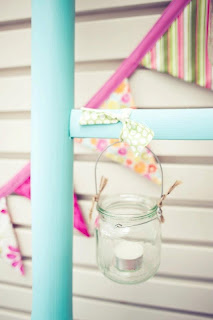
I'd love you put some twinkly lights with some lanterns or tissue flowers


Due to the lack of space, I'm going to need lots of practical storage options. I have a bookshelf that will help open up some space storing books, etc. but I'm still looking for ideas on how to upgrade the plain light brown wood. These are some storage ideas for the walls and the shelves:


Now for the curtains... I have a fairly large closet but the closet door is massive. When the door is open, you can hardly walk in the room. So to fix this problem I'm taking down the door, storing it under the bed, and putting up curtains to hide the mess of clothes. Because this curtain is more textured I'm not sure what curtains I should do over the windows... hmm, any ideas?

These are the curtains I bought

This was my inspiration

I also don't have a headboard so to add some decoration above my bed, I'm going to hang (very securely!) a pallet shelf. I've already made it and painted it.. but that's going to be it's own post! On the bottom I'm going to hang mason jars and place candles in them for some light. I'm going to distress the painted pallet and maybe add some vintage-looking knobs to hang the lights from.


For the bathroom my roommate and I were considering a nautical theme. Here are some ideas were playing with (but in our own patterns and colors, of course!) 


And last but not least, some kitchen ideas. 

Polka dot plates!
which I will be monogramming, of course


Please comment with any ideas or suggestions for color schemes or storage options or just anything really! Hope you enjoyed some of my apartment ideas :)


Wednesday, July 25, 2012

Hand-Pained Monogrammed Serving Dish

A few weeks back my lovely air conditioning decided to break down during unbearably hot days. To beat the heat, my mom, sister, and I planned to get into some air conditioning and went to Clay Cafe to paint some pottery! Just thought I'd show you all what I did...


Before

After going in the kiln 

Saturday, July 14, 2012

Banana-Blueberry Oatmeal Pancakes


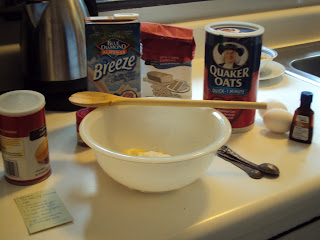
After waking up everyday at 6:30am for work, I found it impossible to sleep in on this rainy Saturday morning. I had a sudden pang for pancakes as I saw the Bisquick box as I reached for my usual bowl of cereal. But instead of reaching for the junk-y stuff, I took it into my own hands to find a healthier recipe for delicious pancakes.  Thanks to minimalist baker and tone tiki I combined their own healthy banana oatmeal pancake recipes and created my own pancakes using the items I already had in the house.


What you'll need:
2 large ripe bananas
1 T baking powder
2 egg whites
1 tsp vanilla extract
2 T almond butter (I didn't use this because I didn't have it!)
6 T almond milk - or any milk you have
1 cup rolled oats
1/2 cup wheat or unbleached flour
1 tsp cinnamon
2 tsp honey
about 1/2 cup blueberries


1. Mash bananas and mix with the baking powder 
2. Mix egg whites, vanilla, almond butter, and milk
3. Add in oats and flour until just combined and sprinkle in cinnamon and honey
4. Cook pancakes on medium heat. The pancakes cooked pretty quickly but don't mistake their browning for burning... mine were slightly browned but you couldn't taste it. Add blueberries while the first side is cooking, then flip.
I used PAM on the pan which is why it looks greasy


I paired mine with a little bit of syrup, whipped topping, and strawberries.. yum!

Monday, July 9, 2012

Chocolate and Peanut Butter Banana Cream Pie

I made this delicious treat with the help from my boyfriend. It was super easy and we both love bananas with peanut butter and chocolate so it was the perfect dessert.


For the crust: Crush about 2 cups of Vanilla Wafers and mix them with about 1/4 cup of melted margarine.  Line the bottom of your pie pan with the crust and bake for about 5-8 minutes at 350F. While that's baking, mix 1/2 cup of peanut butter and a few squares of chocolate (how much chocolate you want to add is up to you.) I heated it for 1 minute on 50% power, stirred, then another minute on half power. Pour over crust and allow to settle. Place in the fridge for about 5 minutes. Meanwhile, slice about 2 ripe bananas and cover the chocolate-peanut butter layer. Mix 1 box of banana cream pie mix as directed on box (probably about 4 cups cold milk). Add 1 cup of cool whip to make the pudding extra fluffy. Pour the mixed pudding into the prepared pie pan and allow the whole pie to set for a few hours. Top with extra Vanilla Wafers and cool whip. Serve and Enjoy!


Tuesday, July 3, 2012

DIY Chevron mirror

My Nonna gave me two framed mirrors she had found at a thrift store (they were originally from IKEA). They were already painted but I wasn't exactly a fan of the design. I got some help from my dad who sanded the paint of using a power sander. This saved me many extra coats off paint trying to paint over the previous design! 


After I painted the background color (white) i used a ruler to draw 1" squares to form a grid. Use the squares to make the chevron pattern equal and neat. Then, I had to cut painter's tape and put them over the chevron patterned line... this part was pretty time consuming! After the tape is secured, paint over the frame with your second color (mine was black) and let dry. Take of the tape and fix any imperfections with a smaller brush. 

For a more in-depth tutorial on how to paint chevron stripes go to this website!

Can't wait to move these to my apartment!


Sunday, July 1, 2012

DIY Monogrammed and Customized Mug

This weekend has been too hot... so to beat the heat I've been working on some creative and cheap crafts for my apartment (I move in in 2 months!). I love cute monograms but buying anything customized online costs too much for my small budget. I saw a tutorial on how to customize ceramics using sharpie and I had to try it. Here is how I monogrammed and customized a mug for the cost of $1.99!


First, I found the mug I liked from Target ($1.99) but you can also use one you already have at home. Using Microsoft Word, I typed up the text I wanted for my mug in the font I downloaded from here. Make sure the font is not too big or too small for your mug! 


After printing the text, cut out a box around the words. On the back of the sheet, color over the printed words with a pencil. This allows for you to trace the words onto your mug . Tape the paper with the text facing you (the penciled side touching the mug) and trace over with the pencil. Like so:


It should look like this once your done tracing!

Draw over the stenciled text with sharpie. Be sure not too smear it while your writing the letters! After you are happy with the sharpie writing, place mug on a cookie or baking sheet and place in the oven. With the mug already in the oven, preheat it to 350 F. Once it is done preheating, let it bake at 350 F for 30 minutes. Let mug cool and enjoy your new mug!